For this exercise, please download and install this Duplicator archive package into a new empty database.
Installed with this package is a plugin called Show Current Template. That will add information on the ADMIN bar when you’re logged in and viewing pages in the browser, showing what template files are involved in the creation of the viewed page.
There is also a basic theme installed. It is called rubberchicken and it is pretty much what the theme looked like at the end of the Bare Bones Theming exercise.
First, some housekeeping: please go into the Customize submenu. I accidentally left two menus in the site. Please delete them. This exercise will make more sense if we go through the entire steps required to make menus.
Debugging and Coding Assistance
Open the rubberchicken theme (wp-content/themes) in your code editor.
Before we get coding, we’ll do two things to make the task easier.
First, edit the site’s wp-config.php file, changing WP_DEBUG to true. This will make PHP error messages appear onscreen. Don’t forget to set it back to false before deploying to a live site: leaving error messages visible on a live site is a security risk.
Then install into Visual Studio Code the following extension, if we haven’t already done so:
- WordPress Snippets
WordPress Snippets gives you a lot of WordPress-specific autocompletion functionality. It is very useful for any theming.
Register Nav Menus in Functions.php
Go the Appearance area in the Dashboard. Apart from the Theme Editor, you’ll notice that almost all of the traditional submenu items under the Appearance menu are missing. Specifically, we don’t see MENUS there.
This is because our theme has not yet created menu locations.
We will do that in one of the mandatory files in a WordPress theme: functions.php. It acts like a plugin for your site, calling functions that happen when the site loads (or on other events).
With functions.php we do a lot of the initial setup of our theme.
Here, we can tell the theme how many menus we want, or how many sidebars (widget areas).
We can tell it to load stylesheets, hosted fonts, or scripts.
We can set custom image sizes.
We can tell WordPress which WordPress features to support (such as Gutenberg wide or full alignment blocks), or what kind of HTML to write.
More advanced things we can do in functions.php include modifying (filtering) default WordPress output or writing custom functions to call in our template files.
Anyway, open functions.php in your editor.
You will see that I have left a number of links inside the file to provide additional background to what we’re going to do here.
One of these links is to the WordPress Codex section on Navigation Menus.
Inside the rubberchicken_setup function, add the following function call, after the various add_theme_support functions. Here we are telling WordPress that we want to create menu locations.
register_nav_menus();
Then pass an array to the function:
register_nav_menus( array() );
Split the array brackets:
register_nav_menus( array(

) );
Each place in a php associative array is a key-value combination separated by a double arrow => .
Using that form, add the first menu location as the first value in the array, as in the next code snippet here.
register_nav_menus( array(
  'menu-main'   =>  'Primary Menu',
) );
On the left is the machine name we will use to refer to the location in template files. On the right is the human-friendly menu location name a user will see in the Dashboard menu area.
Finally, add two more locations. Our function should now look like this:
register_nav_menus( array(
  'menu-main'   =>  'Primary Menu',
  'menu-footer' => 'Secondary Menu',
  'menu-social' =>  'Social Menu',
) );
Here’s what the above code is doing:
- the register_nav_menus() function tells WordPress how many menu locations you want in the theme.
- it is passed an argument in the form of an array of name-value pairs. Each new place in the array is a new menu location.
- that array associates machine-readable names with human-friendly names. The former are used in template files to call the menu the user has placed in the particular menu location. The latter are the names seen in the Dashboard’s Menu Locations area.
- in short, we are here creating three menu locations, and giving each of them two names—one for use in template files, and one for the user to refer to a menu location.
Save your functions.php file.
Make Some Menus in the Dashboard
Now, make three menus. Call them “My Main Menu”, “My Social Menu”, and “My Secondary Menu”.
In the first one, put all the site categories.
In the second one, put links to four social menu companies.
In the last one, put links to the site categories (but no tags).
Make sure that you put each of the menus into one of the menu locations.
After you save a menu for the first time, you should now see, in the Display Location setting, the menu locations you created in functions.php with the register_nav_menus function.
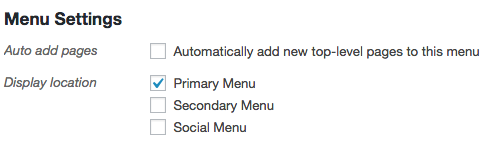
In the screenshot, each location name is missing the “my” prefix: my apologies for the inconsistency.
As you might expect, the human-readable text can have spaces and special characters, whereas the machine naming has to follow typical coding naming conventions. Obviously, these human-friendly names should make sense to the user.
People will typically make the machine names something easy to remember, like (as above) menu-something. The user does not ever see the machine name: it will appear in template files only.
Since the machine-readable name is the name by which we will call the associated menu in template files, it makes sense to me to name them as above, but you may find other names more obvious for each project.
Assign each newly created menu to the appropriate menu location.
If you look at the front page of your site at this point, you will not see your menus output yet. This requires another step in our template files.
Menu Locations in Template Files
Now, open header.php.
First, a tiny bit of housekeeping, unrelated to the exercise. Somewhere near line 19 is the call to the wp_head hook. Select that line, cut it, and paste it just before the close of the HEAD tag. Its original placement was an accident.
Anyway, back to our menu task.
Just after the close of the .site-branding div, make a call to wp_nav_menu.
wp_nav_menu(array(
  'theme_location'   =>  'menu-main',
  'menu_id'          =>  'menu-main',
));
We again see a common WP syntax pattern: a function call being passed an array of key-value pairs.
You will no doubt have guessed that “theme_location” refers to the menu location: the value for that key is the machine-readable name we set in our call to the register_nav_menus function.
There is another key here, too: menu_id. This is the CSS ID that WordPress will attach to the menu in the outputted HTML so that you can refer to it uniquely in your CSS.
Reload the front page of your site in the browser. Inspect it in your browser’s Developer Tools and make sure that the output HTML does indeed have the menu-main id.
Code Challenge 1: Add a Class to the Menu
Using the WordPress Code Reference page on wp_nav_menu, figure out how to add a class of menu-primary to the menu.

Be sure to inspect the menu that’s output and make sure that your new menu-primary class has been added.
Code Challenge 2: Add Another Class to the Menu
Now figure out how to add an additional class to the primary menu. Below, I’ve added classes of nav-menu to the UL, in addition to the menu-primary class we added earlier:

Code Challenge 3: Change the Parent of the UL
While inspecting your menu code, examine the HTML structure around the UL.
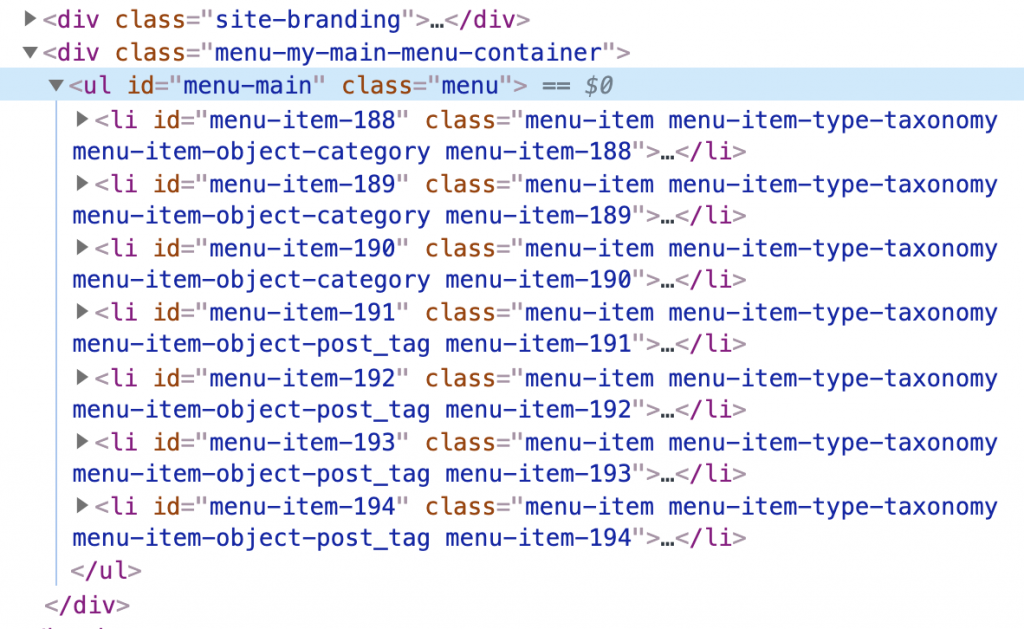
Specifically, notice the parent element of the UL. We see here that WordPress by default wraps a DIV with a class of menu-name-menu-container around the UL (see it in the above screenshot: menu-my-main-menu-container).
Using the Code Reference page, figure out how to change that container DIV when the menu is output to the page. In the screenshot below, we see that the UL now has a NAV element as a parent, not a DIV anymore.

Additionally, figure out how to give that NAV a class of site-navigation, as in the screenshot above.
Code Challenge 4: Add a Menu to the Footer
In the Dashboard, make sure the My Secondary Menu in the installed site is assigned to the Secondary Menu menu location.
Once again, head back to your code editor: copy the entire wp_nav_menu code element from the header.php file and then open the footer.php file.
Paste your copied content just inside the FOOTER element inside footer.php.
We will need to change a few things here:
- change the NAV element class to secondary-navigation
- change the value of the THEME_LOCATION to the machine-readable name for the secondary menu
- change the ul class to menu-secondary
- and add an additional menu class to that UL
Save your footer.php file and then go to any page in your site.
Right near the bottom of the page, you should now see the links to your categories, in a more-or-less unstyled list.
Code Challenge 5: Add A Custom Logo To Your Site
Using this article, figure out how to add custom logo functionality to your site.
Inside the site you’ve installed is is a very basic logo file for an imaginary company called LTR.
Make sure that if the user does not upload a custom logo the site name displays at the top of the page.
In part two of this menu exploration, we will add google fonts, load font awesome and learn about the enqueuing functions that are fundamental to WordPress.