In the template-parts folder, duplicate content-staff-member.php and name the copy content-meal-menu.php.
Here’s the contents of the new file:
<?php ?>
<article <?php post_class(); ?>>

  <div class="post-thumbnail">
    <?php the_post_thumbnail(); ?>
  </div>

  <h2><?php the_title(); ?></h2>

  <div class="staff-member-postion">
    <?php the_field('staff_member_position'); ?>
  </div>

  <div class="staff-member-description">
    <?php the_field('staff_member_description'); ?>
  </div>

</article>
Change that code in the following way:
- change two classes
- change two fields
- remove the post-thumbnail div
- add the content area
<?php ?>
<article <?php post_class(); ?>>

  <h2><?php the_title(); ?></h2>

  <div class="menu-start-time">
    <?php the_field('menu_start_time'); ?>
  </div>

  <div class="menu-end-time">
    <?php the_field('menu_end_time'); ?>
  </div>

  <div class="entry-content">
    <?php the_content(); ?>
  </div>
</article>
Now edit front-page.php
Duplicate the Staff Members Section and change the following things:
- section class to meal-menu (in the html)
- post_type to meal_menu
- posts_per_page to 1,
- get_template_part (in the while loop) to template-parts/content-meal-menu
Put the meal menus section ahead of the staff members section in the front-page template file.
How To Output the Background Image
Finally edit your content-food-menu template part. Specifically, add a new style attribute to your opening article tag.
<article <?php post_class(); ?>
  style="background-image: url('https://picsum.photos/2000/800');
        background-size: cover;
        background-repeat: no-repeat";
  >
Here, you are adding a style attribute directly to the opening article tag. I formatted the code as above to make it really clear what is what in that code.
Test the front page of the site. You should see a random image behind the menu.
Get the Background Image URL
In the above snippet, I am testing with a placeholder image from picsum.photos.
Now let’s replace that URL with a call for the background image the user has chosen for the menu.
Again, start by replacing the URL value with a dynamic call to the_field().
<article <?php post_class(); ?>
  style=
    "background-image: url('<?php the_field('background_image'); ?>');
     background-size: cover;
     background-repeat: no-repeat"; >
If you reload the page and the image doesn’t show up, here’s how you can troubleshoot.
Open the Inspector.
If we inspect the article, we might see that information is being put into the background-image URL attibute, but that there’s much more data than we’d expect to see.
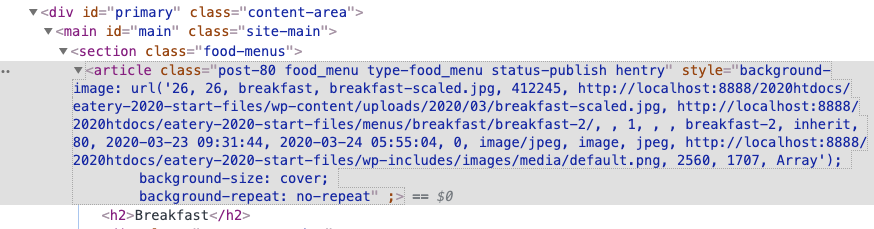
The solution? Go back to the Custom Fields area in the Dashboard and see if we can modify the output of the image here.
If we edit the Background Image field, we find the solution.

We’re getting an Array. We just need a URL. Click on the second button there.
Then go reload your page. Voila:

But before we leave this template part, click on the Breakfast link in the menu.
Oh oh.
You might see the page reload, but it won’t go to the breakfast menu.
The reason for that is when we use a link like #breakfast, we actually need to have an element with an ID of breakfast: remember, in css, all IDs must start with the # symbol.
So we will need to insert into the opening article tag for the content-meal-menu template part a dynamically generated ID. Here’s how you could do that:
<article <?php post_class(); ?> id="<?php the_title_attribute(); ?>">
For brevity and clarity, I have here removed the inline style attribute, but don’t delete it from your code.
You might be asking right now:
- why don’t we just use the_title()?
- what is the difference between the_title() and the_title_attribute()?
You will, in fact, see people use just the_title(), but it is better to use the_title_attribute().
The reason for this is that the_title_attribute() escapes the output for use as an attribute.
What this means is that it converts code that could be either malign (put into the title by an angry employee, for example) or code that would unintentionally cause errors.
Image that you had a post title that you wanted to use as an ID, such as this one:
I am “a stable genius”, said someone who is not stable or a genius.
Using the_title() would output the quotation marks (if an editor or admin user wrote it, I believe). That would leave you with code like this:
<article id="I am "a stable genius", said someone .... ">
In other words, our ID would close after the word am, because the opening of the quotation would be interpreted as the closing of the ID attribute.
So the_title_attribute() will encode any potentially problematic characters as entities (like &rdquo or &rdquo, for left double quote and right double quote, respectively).
The browser will not interpret what’s in the attribute as code, in other words.
Note: IDs are case sensitive, so your # link will probably need to start with a capital letter (if the menu title starts that way, that is).
Your Tasks For the Exercise
Add the remaining food menus (lunch and dinner). To do that you might need to review how we made the breakfast menu posts.
Consult the screen shots for each menu’s open and close time.
Get the three menus to output in the front page. That will take one loop that returns three results.
Make sure that they do not display randomly, but rather display in this order: breakfast, lunch, dinner.
Hint: the WordPress Developer Handbook has an excellent discussion of WP_Query which will be of assistance here.
Make a Reservations area in the front page of the site.
To do this, make a new page called Reservations. Then use the Ninja Forms plugin to make a table reservation form.
If Ninja Forms gives you any error messages, consult this page: Ninja Forms Issues.
Using another custom loop and a new WP_Query object, output that specific page in the front-page template (after the breakfast, lunch, and dinner menus).
To do this, you will likely need to look for information in the WordPress Developer Handbook page on WP_Query.
You will also need to do significant modification and styling of the form area.

Output a Blog section on the Site.
To do this, use the “regular” loop on the page. No new WP_Query, in other words.
Make at least 10 regular WordPress posts — not custom post types.
Use lorem ipsum text for the titles, the content, and the excerpt.
Use a food-related feature image for each.
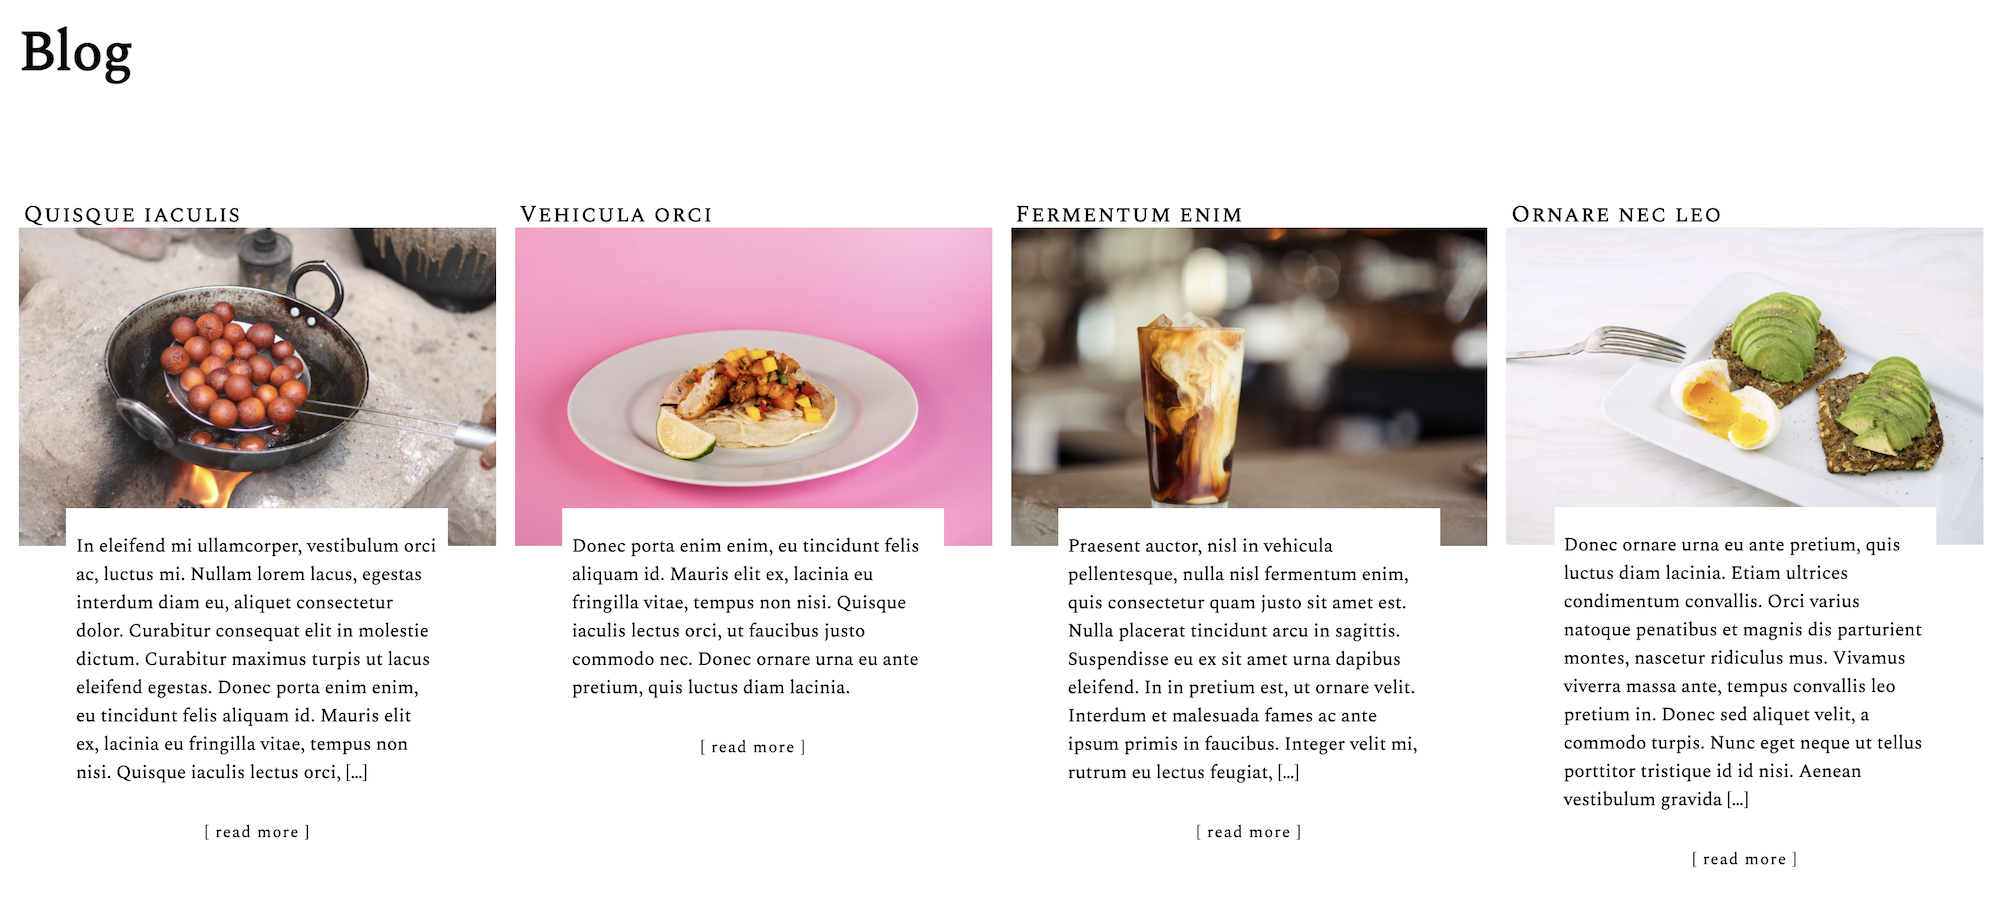
Output eight of these posts on the front page: you can set that in the Dashboard in Settings.
Include the posts_navigation function so that a user can see the remaining posts, if they want.
To put in the feature images quickly and conveniently, install the Instant Images plugin. Use landscape orientation images, with the same aspect ratio (you can usually guess similar ratios just by looking). If any images have a different aspect ratio than the others, they’ll disrupt the layout. Fix that by replacing any images that don’t conform to the desired ration..
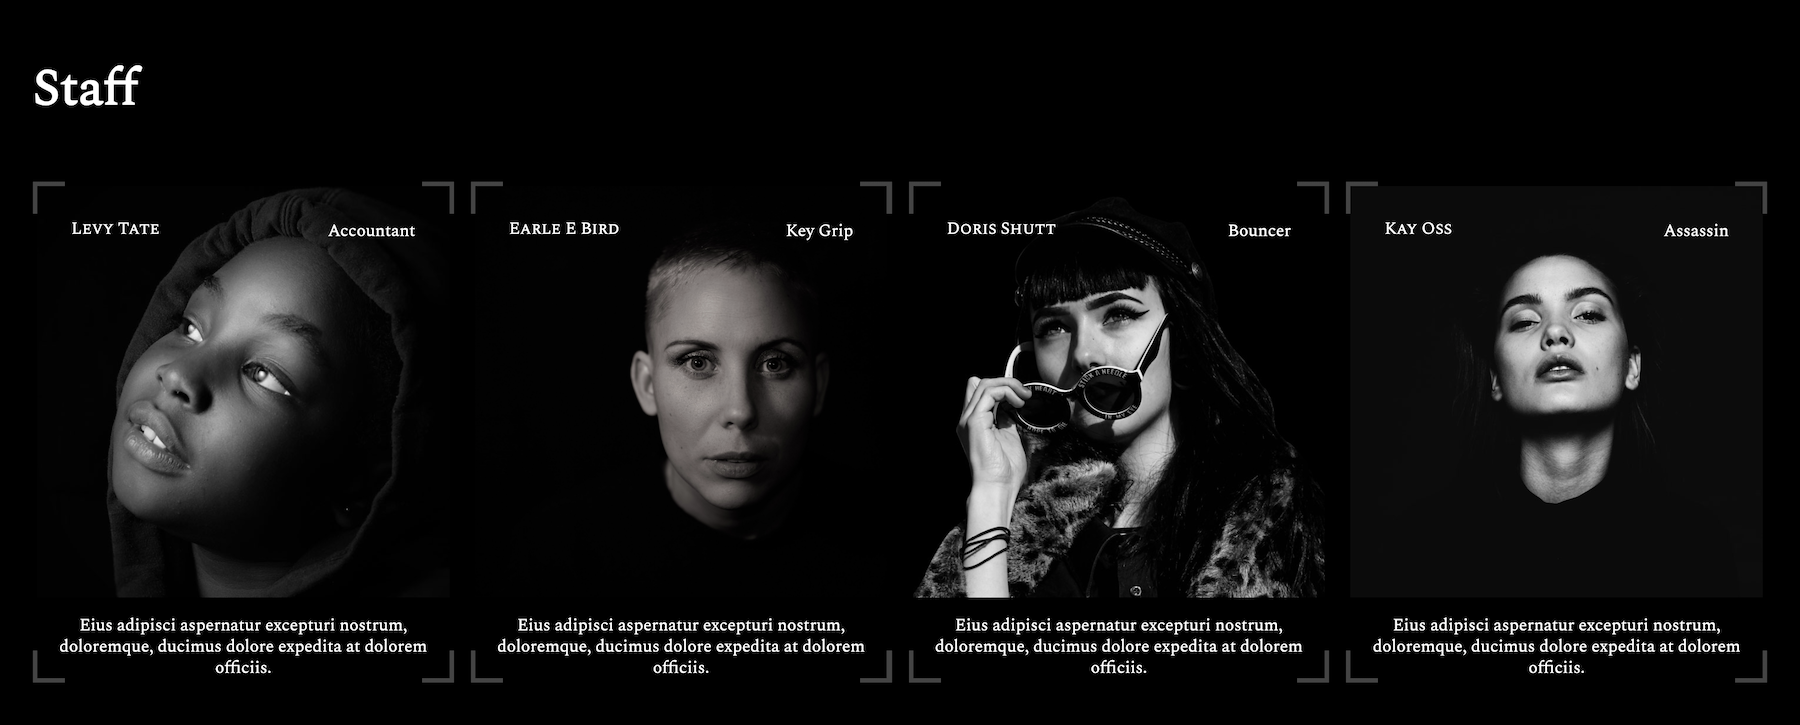
Move and Modify the Staff Section.
Make the Staff section have four random Staff Members. Put that section after the Blog. Each staff member will output the name, the position, the description, and the feature image.
Style them like this:
Make a Footer like in the Preview Video.
It will have a small logo, the social menu, and a back to top graphic link. All will be centered. The back-to-top icon is from font awesome. The free version might not have one pointing upward, but you can work around that issue with css.

Style the site
Make it look and behave as close as possible to that displayed in the loom video. The video has additional details about the look and behaviour of the site.
In short, there are two main content areas in the site:
- home page: 3 menus, 1 reservation form area, 1 blog area with 8 regular posts, 1 staff area with four random staff members.
- single view of blog posts
Additional Details
- The fonts are from Google: spectral and spectral sc (small caps) for headings. You choose the appropriate weights.
- The background image covers the whole area of each food menu
- The background image doesn’t move when the page scrolls: investigate the various background properties.
- The movement from the jump links to individual parts of the page, as well as the back-to-top link, use the CSS scroll-behaviour property. The effect does not require JavaScript.
- Scroll and pause the video running at full screen to see the alignments, etc.
- Do not worry about styling the staff archive. We’ll let next year’s students worry about that.
When you are done both parts:
- Make a duplicator archive of your site.
- Put the duplicator archive and installer in a folder called wp-eatery-firstname-lastname
- Zip that folder.
- Hand it in to our course folder on BrightSpace