About Custom Loops
This will be one of the more complex topic we cover in this class, but knowing how to make multiple loops in a single template file gives you some amazing abilities.
The default loop gives you posts in order of most recent to least recent.
However, with custom loops, we can select from a wide range of possible criteria with which to assemble and output our content.
Moreover, with multiple custom loops, we can:
- have different sections on the page, each with their own content items. This content can be grouped by category, tag, author, date, reverse-chronology, etc.
- have sections on the page with different numbers of content items
- have random items
- have different iterations of the loop call different template part files
- etc
This is all made possible with the WordPress WP_Query class. Think of each new wp_query object as a trip to the database pulling out the content you need for each particular part of the page.
To read about all of the various parameters available with WP_Query, the WordPress Developer article on the subject is very helpful. A number of useful code snippets are provided there as well.
To get a sense of what I mean here, examine the image below, a 2016 screenshot of LangaraPRM.com.
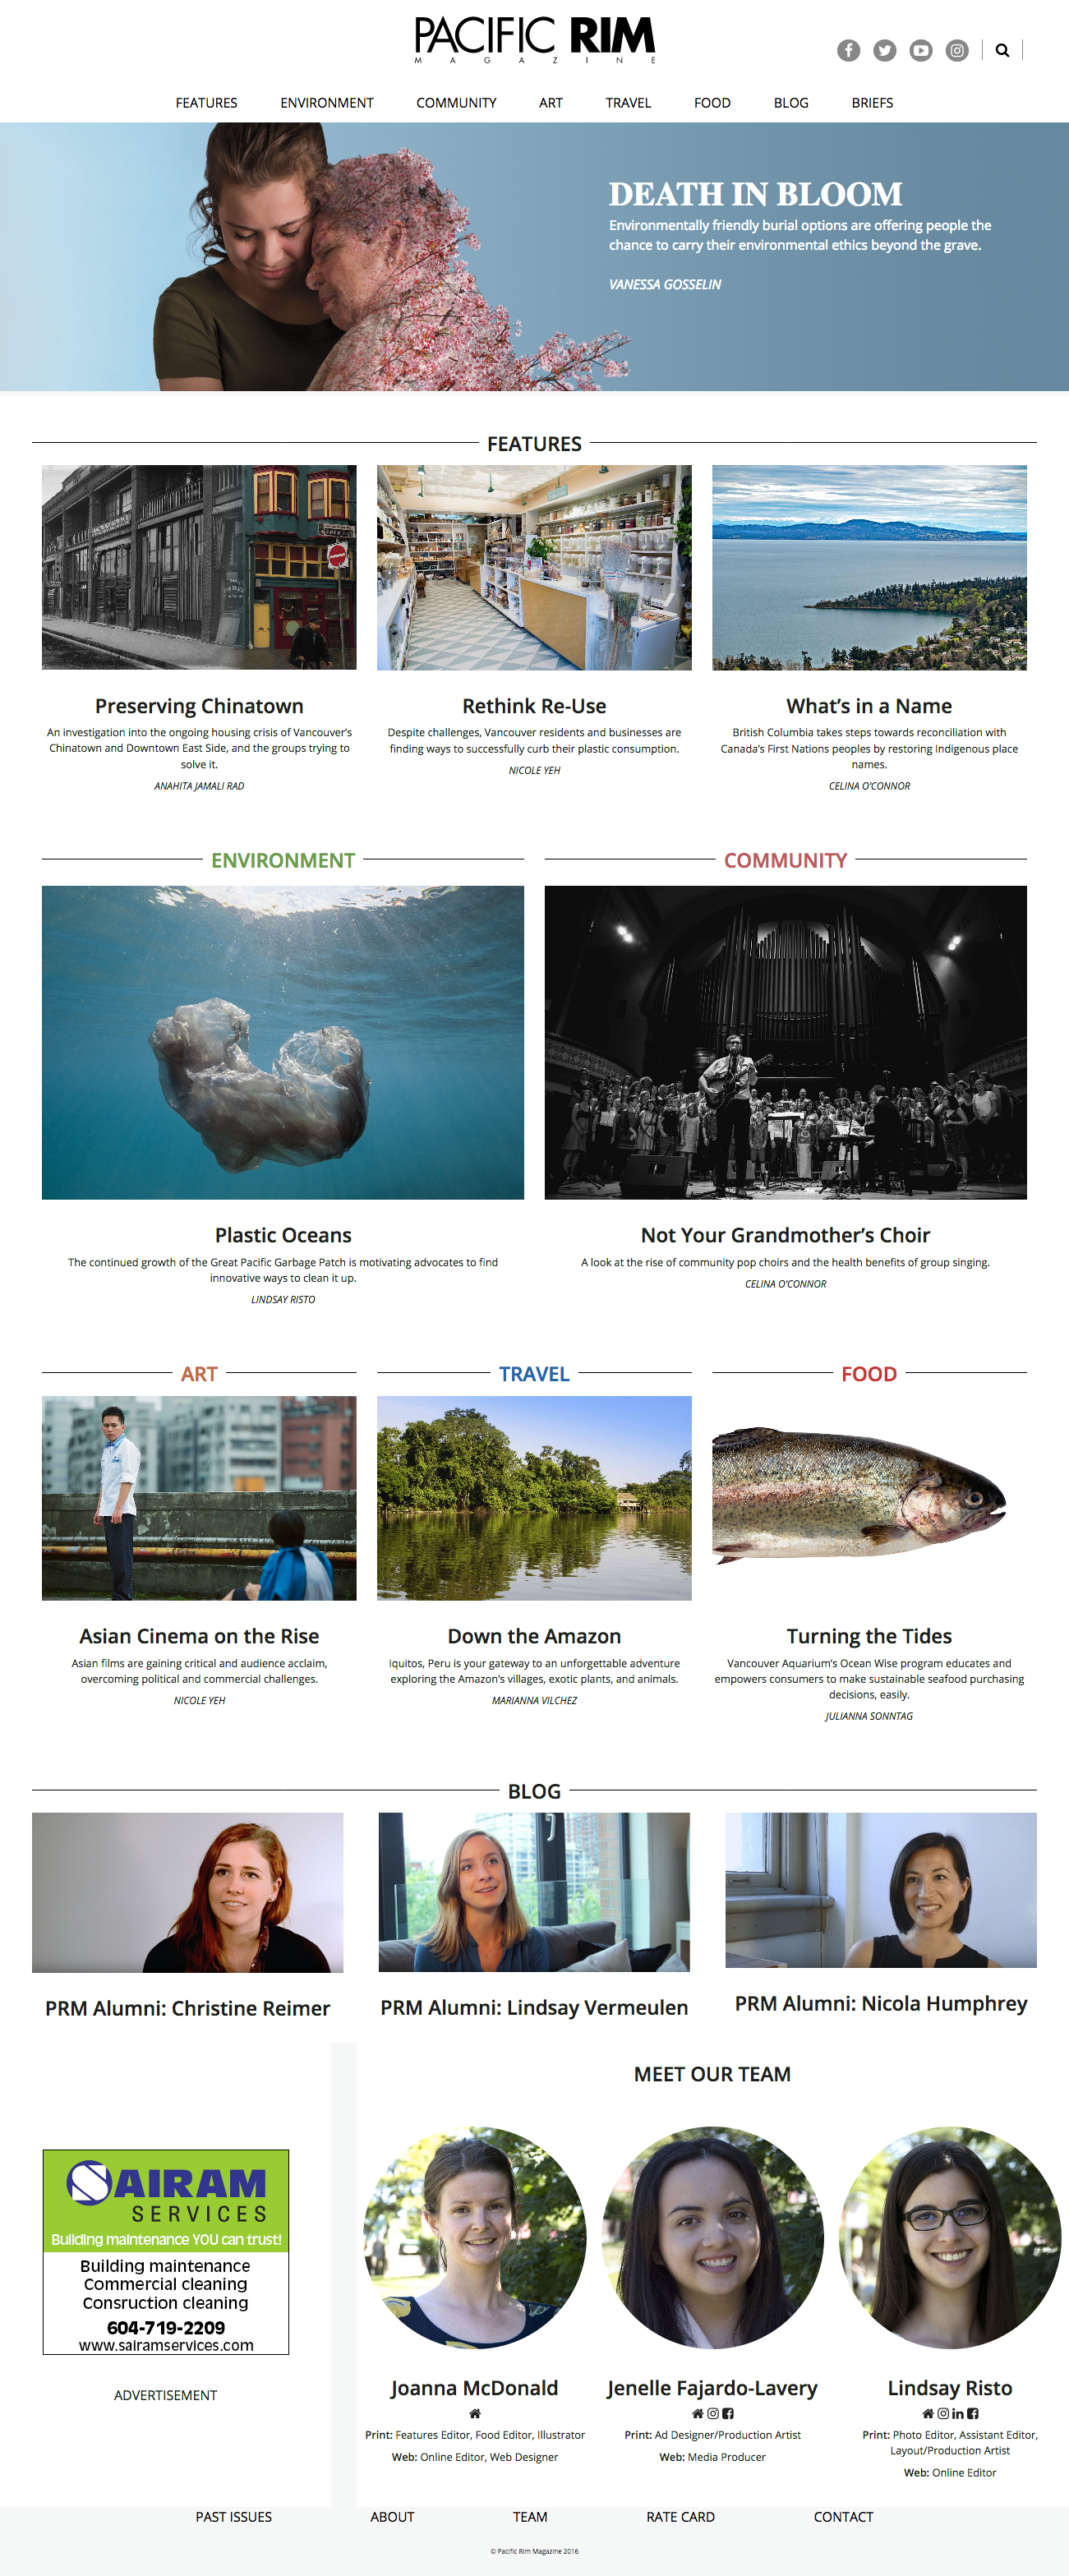
There are a number of sections on that page: Features, Environment, Community, Art, Travel, Food, Blog, Team Photos, Advertisement.
Each is a custom loop.
- Features grabs the four most recent feature tagged entries from the database,
- the next five sections get the single most recent post from each Category on the site that year,
- the Blog section grabs the three most recent blog custom post type entries,
- the Advertisement section grabs a random ad, and
- the Team section gets from the database three student custom post type entries. These are also randomized.
Moreover, each entry in these different sections can have different content pulled out. For example, some of the above content types have excerpts, while some do not. Some have larger feature images than others. The Team section gives social media links for each student—information stored with the post as a custom field.
( As an aside: to use custom fields, go to Screen Options in the post editing window and select it. Better yet, investigate one of the most widely used plugins in the WordPress world: Advanced Custom Fields ).
In short, custom loops greatly expand the ability of WordPress to be a true Content Management System as opposed to just a blogging platform.
In other words, in each section, we can call a different template part, or use conditions to test what kind of content (category, tag, post-type, etc) we are calling from the database, and modify the output accordingly.
Some Sample Content and Screenshots
For this exercise, I have created a Duplicator archive of a small site.
Please download the duplicator package. Use Chrome rather than Safari: Safari automatically unpacks ZIP files unless a preference setting is changed.
Please also download the screenshots for the lab part of the exercise.
Unpack the zip file by double-clicking it (Mac) or right-clicking (Windows). This will leave you with a folder called pedalmania2020. Put that folder in your testing environment htdocs folder (or equivalent).
Start MAMP, make a database called pedalmania and then run through the Duplicator process. Add a new Admin user (you) as part of that process.
A Starter Theme
Please download this basic starter theme I have made for the exercise.
Rename your theme folder pedalmania-your-initials.
Install your newly modified starter theme inside wp-content/themes.
Set up a new project in whatever editor we’re using in class.
If we have done SASS in class, make use of the SASS structure I have included. If you haven’t used SASS before, just edit the style.css file.
If using SASS, you will need to add more files: I’ve included only the “root” style.scss file and some folders. Inside the style.scss file, add the WordPress theme boilerplate (you can copy it from the style.css file that is in the top level of the theme).
Change the name of the theme to pedalmania your first name and the author to your first and last name.
Change the text domain to pedalmania-your-initials.
If we haven’t done SASS yet, just use the style.css file that’s in its regular place in the theme. You can skip down to the Functions.php Tweak section a few paragraphs below this one. Inside the style.css file change the name of the theme to your first name and the author to your first and last name.
If you’re using SASS, though, the files and folders you make need to make sense to you and the logic of your project. Feel free to use my sass organization, or to modify it.
Functions.php Tweak
Finally, open functions.php and replace every instance of the word THEMENAME with your actual theme name (your first name).
Don’t forget to make your new starter theme the active theme.
A New Template File
For this project, we’re going to make a front page that looks significantly different from archive or search results. For that reason, we won’t use index to display the front page. Instead, we’ll make a new template file by duplicating index.php: call the duplicated copy front-page.php. Index will still remain as the “final fallback” template file.
Open front-page.php in your preferred text editor. Our code should look more or less like what is below.
<?php
get_header();

  if ( have_posts() ) :
    while ( have_posts() ) :
      the_post();
      get_template_part('template-parts/content');
    endwhile;
  else :
    get_template_part('template-parts/content-none');
  endif;

get_footer();
If you look inside the content.php template part, you’ll see that with each pass through the loop, it is just outputting an article with the post’s title and categories.
If we test the site in a browser, we see this:
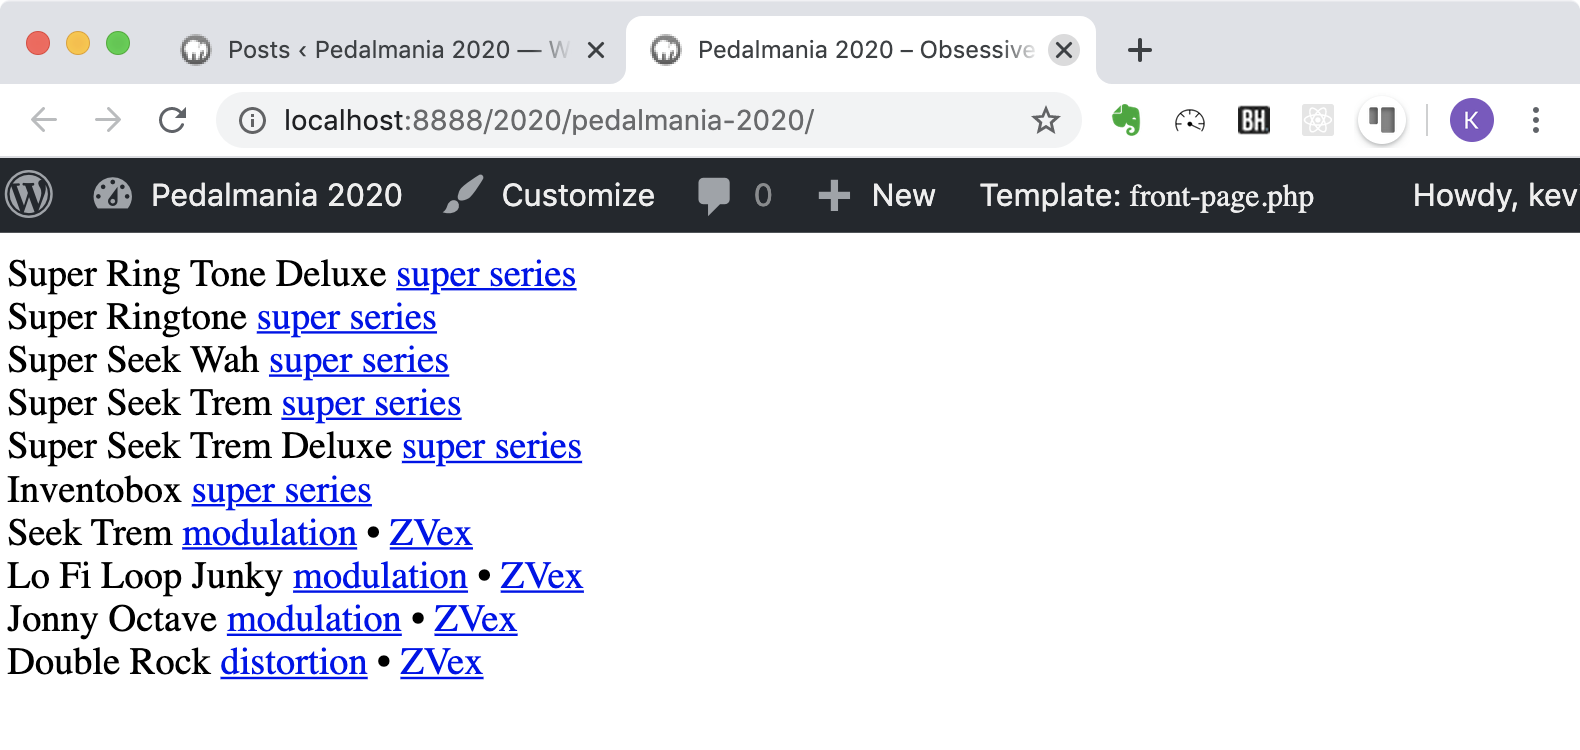
In other words, we we see that we get posts listed in this order:
- Super Ring Tone Deluxe
- Super Ringtone
- Super Seek Wah
- etc etc
This is the normal reverse chronological order. However, above your loop in front-page.php, add the following. Type the changes to the code; don’t just copy from the page you’re reading.
/* FUZZ QUERY ====================== */
$args = array(
  'category_name'     => 'fuzz',
  'posts_per_page'    => '2',
  'orderby'           => 'rand'
);

$fuzz_query = new WP_Query($args);
What we are doing here is making a new array that contains details of the kind of content we want to output initially.
Then we are passing those details to the WP_Query constructor: we are making a new object that will have two randomly-selected posts from the fuzz category (there are four categories in the sample site I have given you).
If you test the front page of the site at this point, you won’t see any change. The reason for this is that the default query is still being output to the screen.
Change your query to look like this. Specifically, you need to change the two calls to the two have_posts() functions and the one call to the_post() function.
if ( $fuzz_query->have_posts() ) :
  while ( $fuzz_query->have_posts() ) :
    $fuzz_query->the_post();
    get_template_part('template-parts/content');
  endwhile;
  else :
    get_template_part('template-parts/content-none.php');
endif;
Your two code sections should look like this:
/* FUZZ QUERY ====================== */
$args = array(
  'category_name'     => 'fuzz',
  'posts_per_page'    => '2',
  'orderby'           => 'rand'
);

$fuzz_query = new WP_Query($args);

if ( $fuzz_query->have_posts() ) :
  while ( $fuzz_query->have_posts() ) :
    $fuzz_query->the_post();
    get_template_part('template-parts/content');
  endwhile;
  else :
    get_template_part('template-parts/content-none.php');
endif;
Reload the page a couple times and you will see that each time you get two new random posts from the FUZZ category.
Now duplicate the entire loop, and just change the name of the new query (in four places) to $modulation_query.
In the array passed to the new object constructor, change the category name to “modulation”. Here, then, are both loops:
/* FUZZ QUERY ====================== */
$args = array(
  'category_name'     => 'fuzz',
  'posts_per_page'    => '2',
  'orderby'           => 'rand'
);

$fuzz_query = new WP_Query($args);

if ( $fuzz_query->have_posts() ) :
  while ( $fuzz_query->have_posts() ) :
    $fuzz_query->the_post();
    get_template_part('template-parts/content');
  endwhile;
  else :
    get_template_part('template-parts/content-none.php');
endif;

/* MODULATION QUERY ==================== */
$args = array(
  'category_name'     => 'modulation',
  'posts_per_page'    => '3',
  'orderby'           => 'rand'
);

$modulation_query = new WP_Query($args);

if ( $modulation_query->have_posts() ) :
  while ( $modulation_query->have_posts() ) :
    $modulation_query->the_post();
    get_template_part('template-parts/content');
  endwhile;
  else :
    get_template_part('template-parts/content-none.php');
endif;
Now if you test your home page, you will see that you now are getting random posts from two separate categories.
In the example code above, we are selecting posts by category and in random order. We can, however, select by tag, by post format, by custom post type, by not being in a category, etc. And we can arrange our content in chronological or reverse chronological order. We can sort by number of comments, etc.
If you need to use the main loop on the page, make sure that you run wp_reset_postdata() after your custom loops code.
Getting comfortable with WP_Query allows you to easily pull practically anything you want from the site database. The WordPress Developer Handbook article is exceptionally helpful in figuring out how to retrieve that content.
Your Lab Task
Please complete the site. If you look at the screenshots, you will notice that our home page needs one more loop (right at the beginning of the posts generation).
Specifically, we need three posts from the Super Series category. Make this query not random. Instead, have it output the three most recent posts in the Super Series category.
Fonts
The fonts used are from Google: Bebas Neue and Libre Baskerville.
Menus
These buttons in the header are not a WordPress menu: the HTML that produces them will just be put into the page in header.php, so you can use font-awesome in the traditional way (an empty span or i element with the appropriate font-awesome classes).
When one of the three buttons in header is clicked, one of the site’s two menus or the search form slides down underneath the header. It sits on the main content (a bit), but not on the header. There are screenshots of active menus and active search form.
This functionality will require you to enqueue a javascript. Your solution will probably involve the js classlist property, and CSS transitions, transforms, positioning, and z-index.
A quick summary of how to add or remove classes in response to button clicks.
Other Layout Details
On the front page when at the bigger screen width, posts from the FUZZ category take half the screen. The others take 1/3 of the screen.
Please style the site as closely as possible to the examples in the screenshots. I have given you screenshots for Home, Archive, and Single views in both small and large sizes. Make search results look like archive pages.
Additional Lab Task
If you look at the screenshot below, you will notice that the pedal has a date of first manufacture and a price (both are in the bottom left of the article).
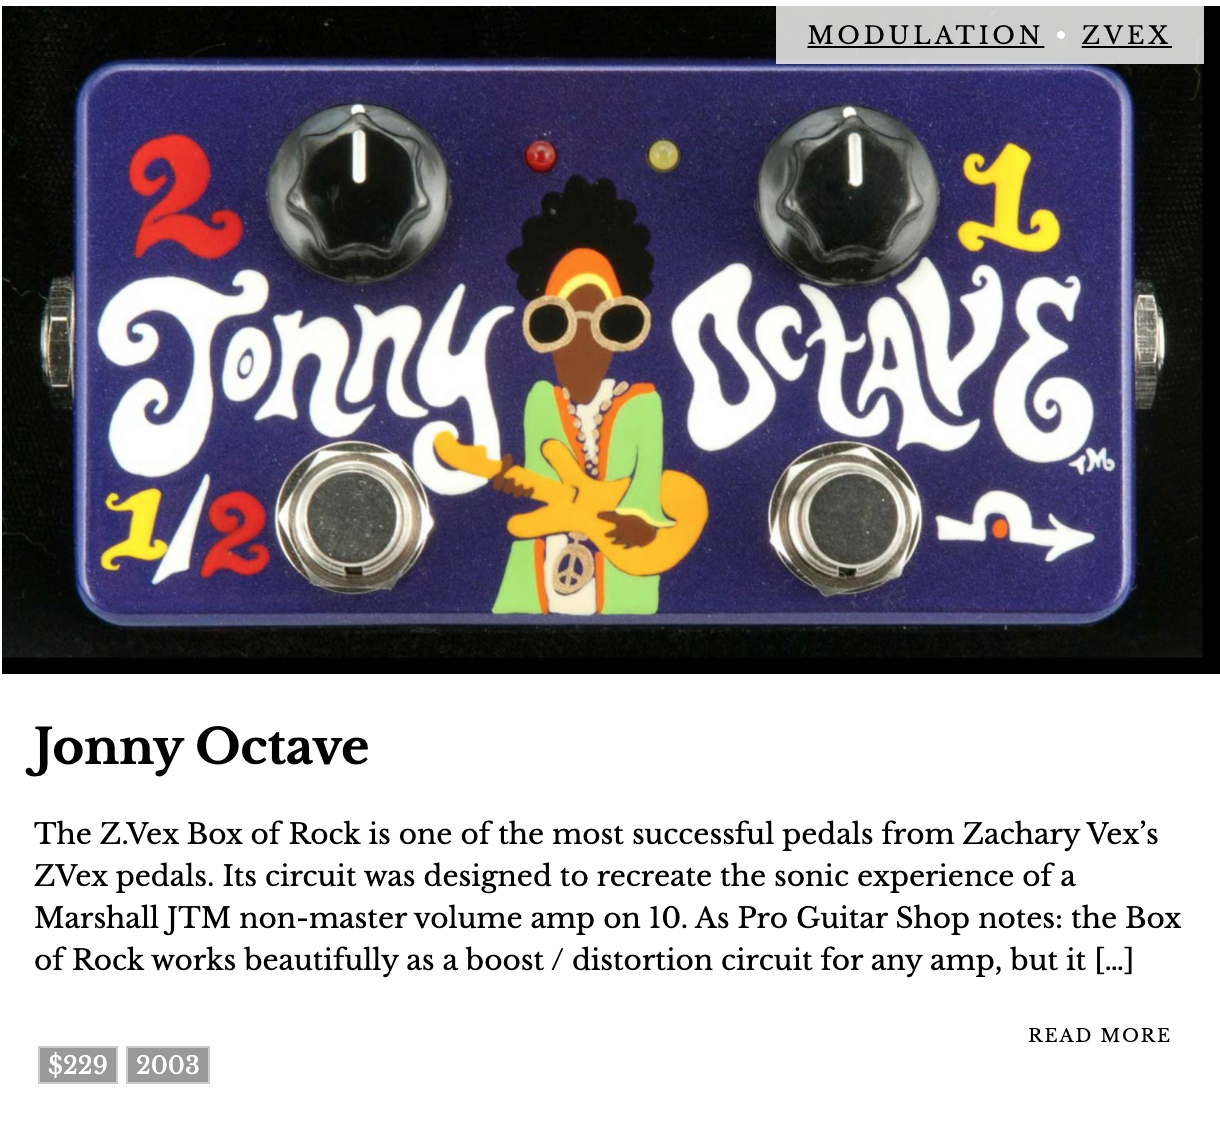
This is done with Custom Fields. These fields allow us to add additional data beyond the standard fields that show up when we make a new post.
If you don’t see the custom fields in the Dashboard, go to Screen Options (top right of screen when you’re editing a post in classic view, or the OPTIONS area available from the vertical ellipsis in the top right in Gutenberg ) and choose Custom Fields.
Now, figure out how to output and style the custom fields where and how we want them (ie as in the above screenshot).
For assistance in that task, consult this article.