Often you will need to process a number of photos at the same time, with the same settings.
For a single image, you can use Photoshop’s Export > Save For Web feature or right click on a layer and chose Export As…
For batches of image, you can record Actions, which are the Photoshop equivalent of a macro, then go File > Automate > Batch.
You can also use the Image Processor function found at File > Scripts.
Another option, though, and one that I think is more user-friendly, is to use the free open-source XnConvert. It’s available for Mac, Windows, and Linux.
If you want to go through the steps, please download these images.
The downloaded images are 11 landscape shots of Berlin. ( CC-BY: Marcus Spiske / raumrot.com ).
Open XnConvert
Drag the folder into the open XnConvert Input window.
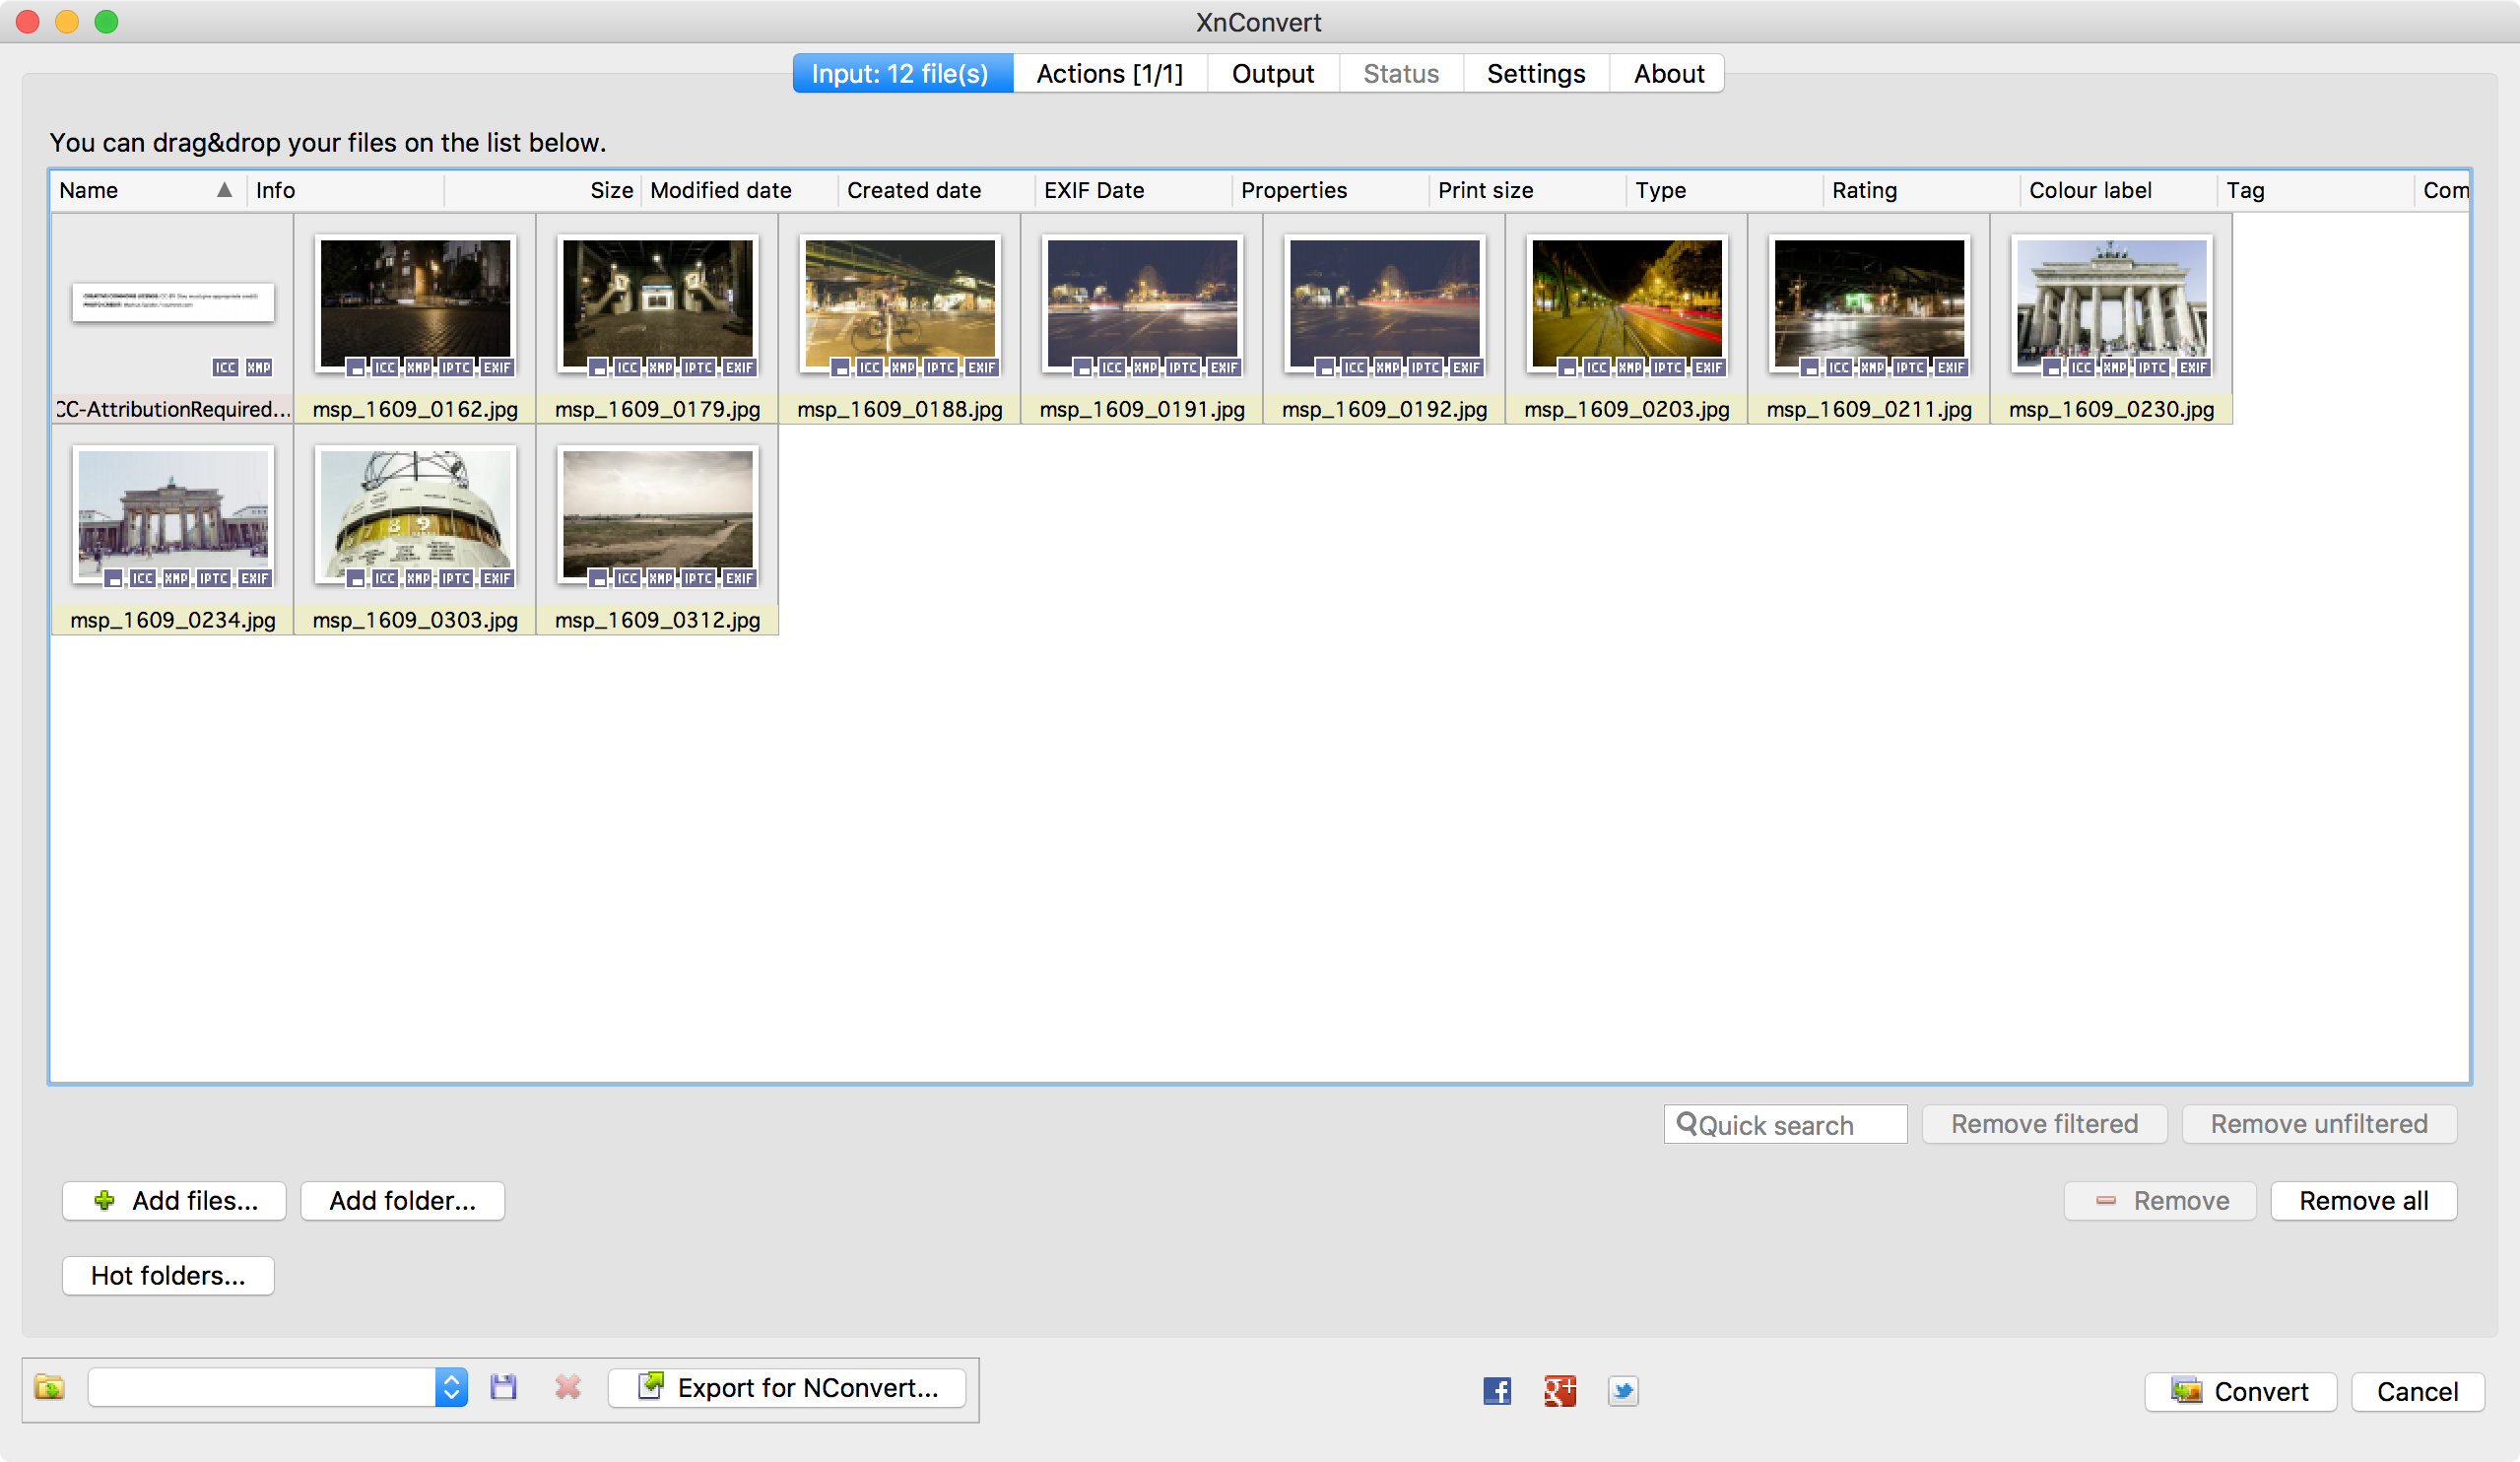
We see that the first file is actually a text file. Delete it from the window.
Select all the images by clicking the first one and then shift-clicking the last one.
Click on the Actions tab.
Click on Add Action, then choose Image, then Resize.
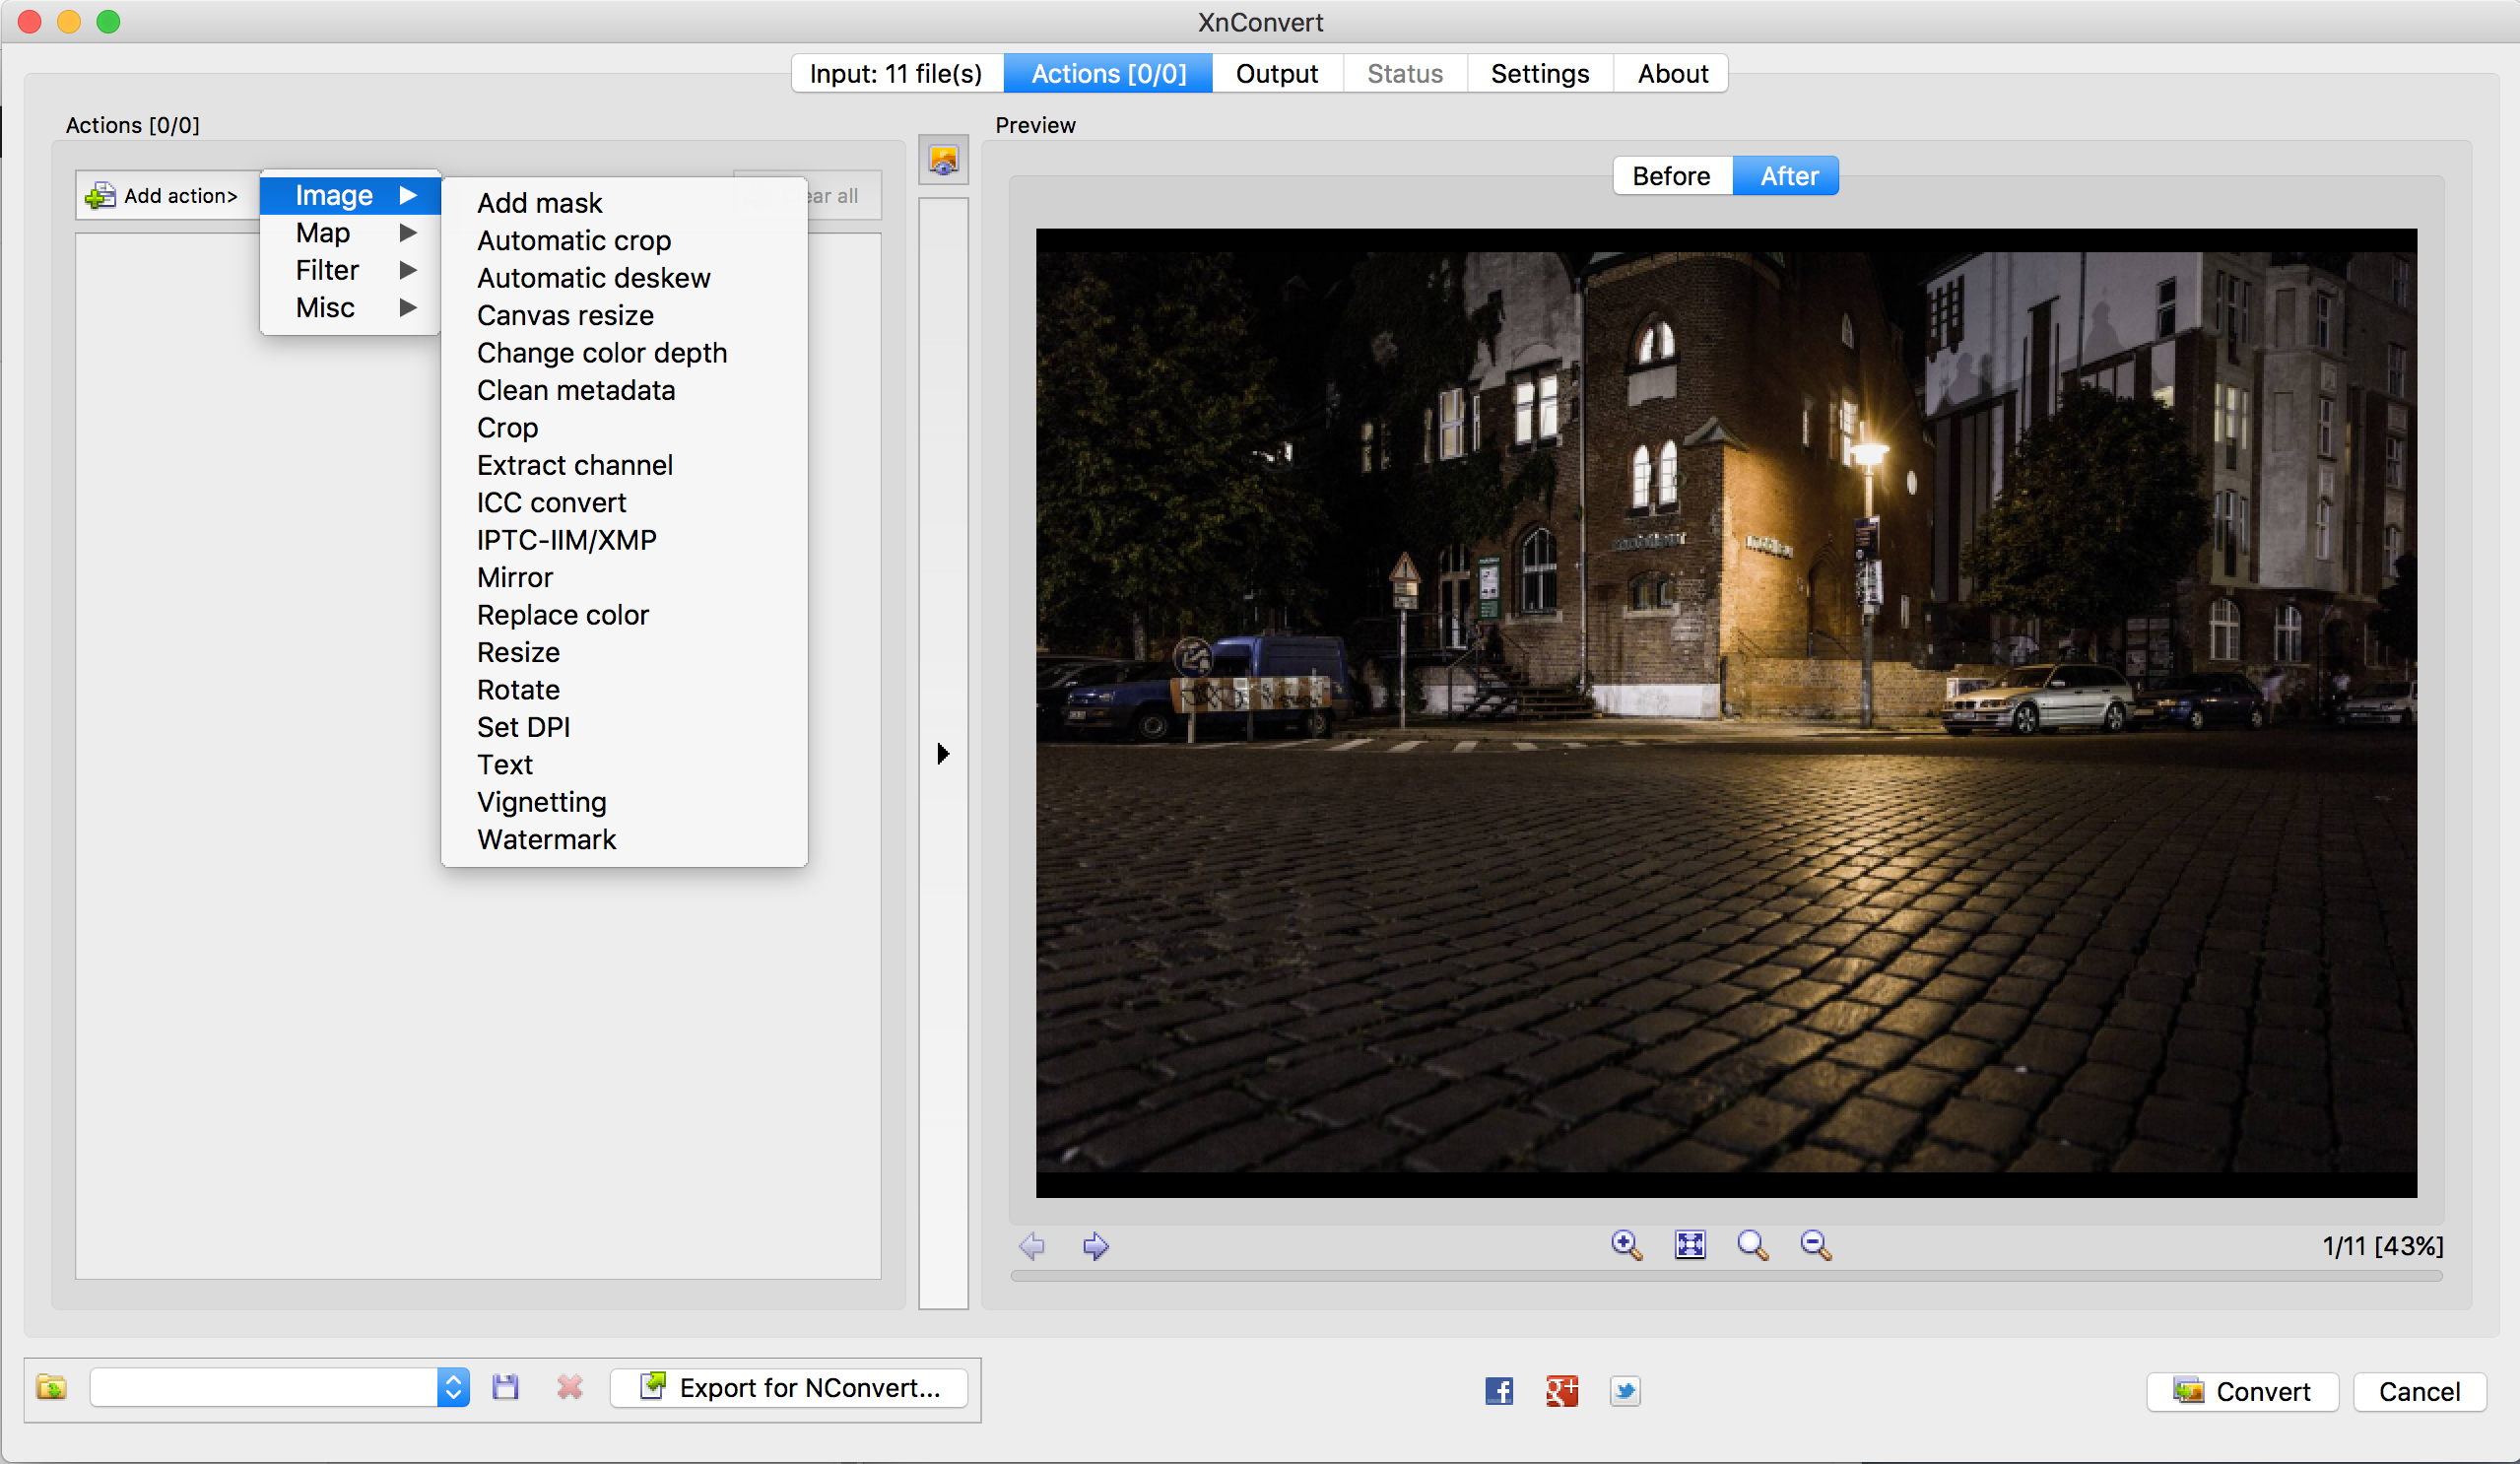
Below I chose Longest Side because the images we’re processing are all landscape.
The original images are 1600px, but we’re scaling them down to 1000px. This alone will create significant file size savings.

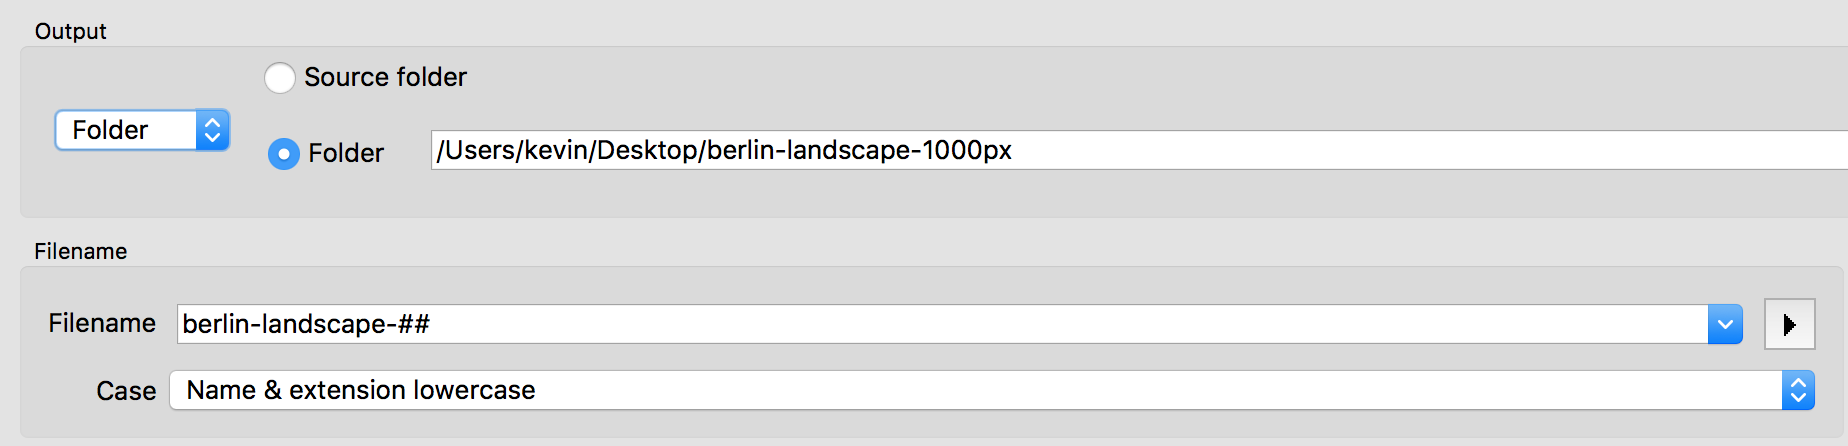
Now click on the Output tab.
This section is the easiest to make an error with, so I always recommend that you save your processed images into a new folder.
To do that, I chose Folder rather than Source Folder and clicked the ellipsis button at the end to specify which folder to save to (in this case: berlin-landscape-1000px).
In this process, you’ll probably also want to change the file names. To do that, write the new name you want.
Typically, you’ll also want to assign a number at the end of the batch-processed files. To do that, click on the triangle at the end of the row and choose Numeric Operator. If you do that twice, your numbers will be double-digit (at least).
Here are these initial settings and where you’ll find them.
Before converting, though, you need to specify what format you want.
If you’re converting photos, you most likely want JPG. Select that from the FORMAT drop down menu, then click settings.
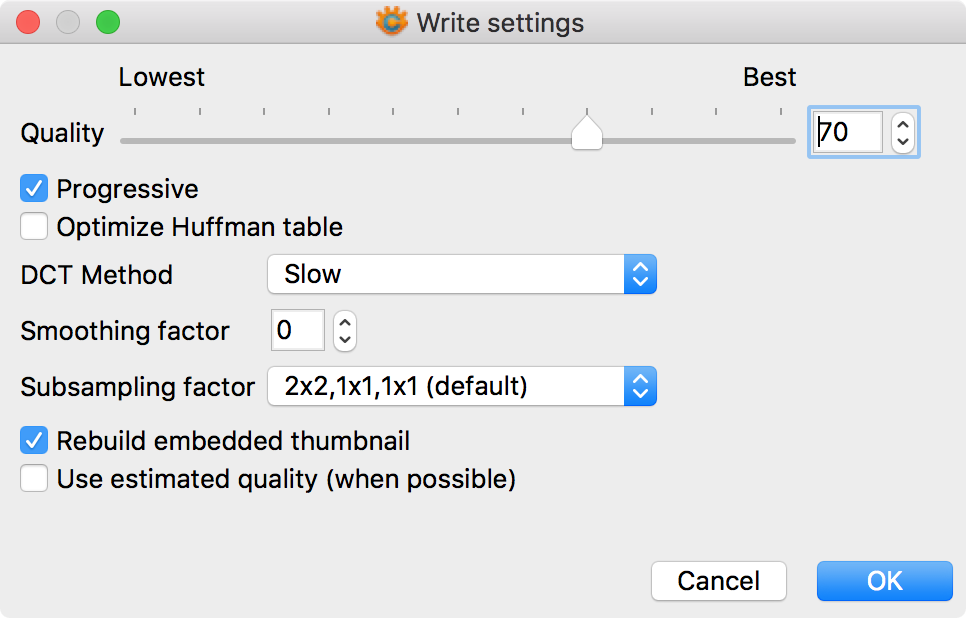
I would recommend you run a batch at 70, then one at 60. The lower the Quality setting, the lower the file size.
Obviously you will need to compare the results, though: different images compress differently.
As a rule, the more sharpness in the photo, or high contrast, the harder it is to compress.
When checking, look for visible degradation of the image at areas of contrast or sharpness.
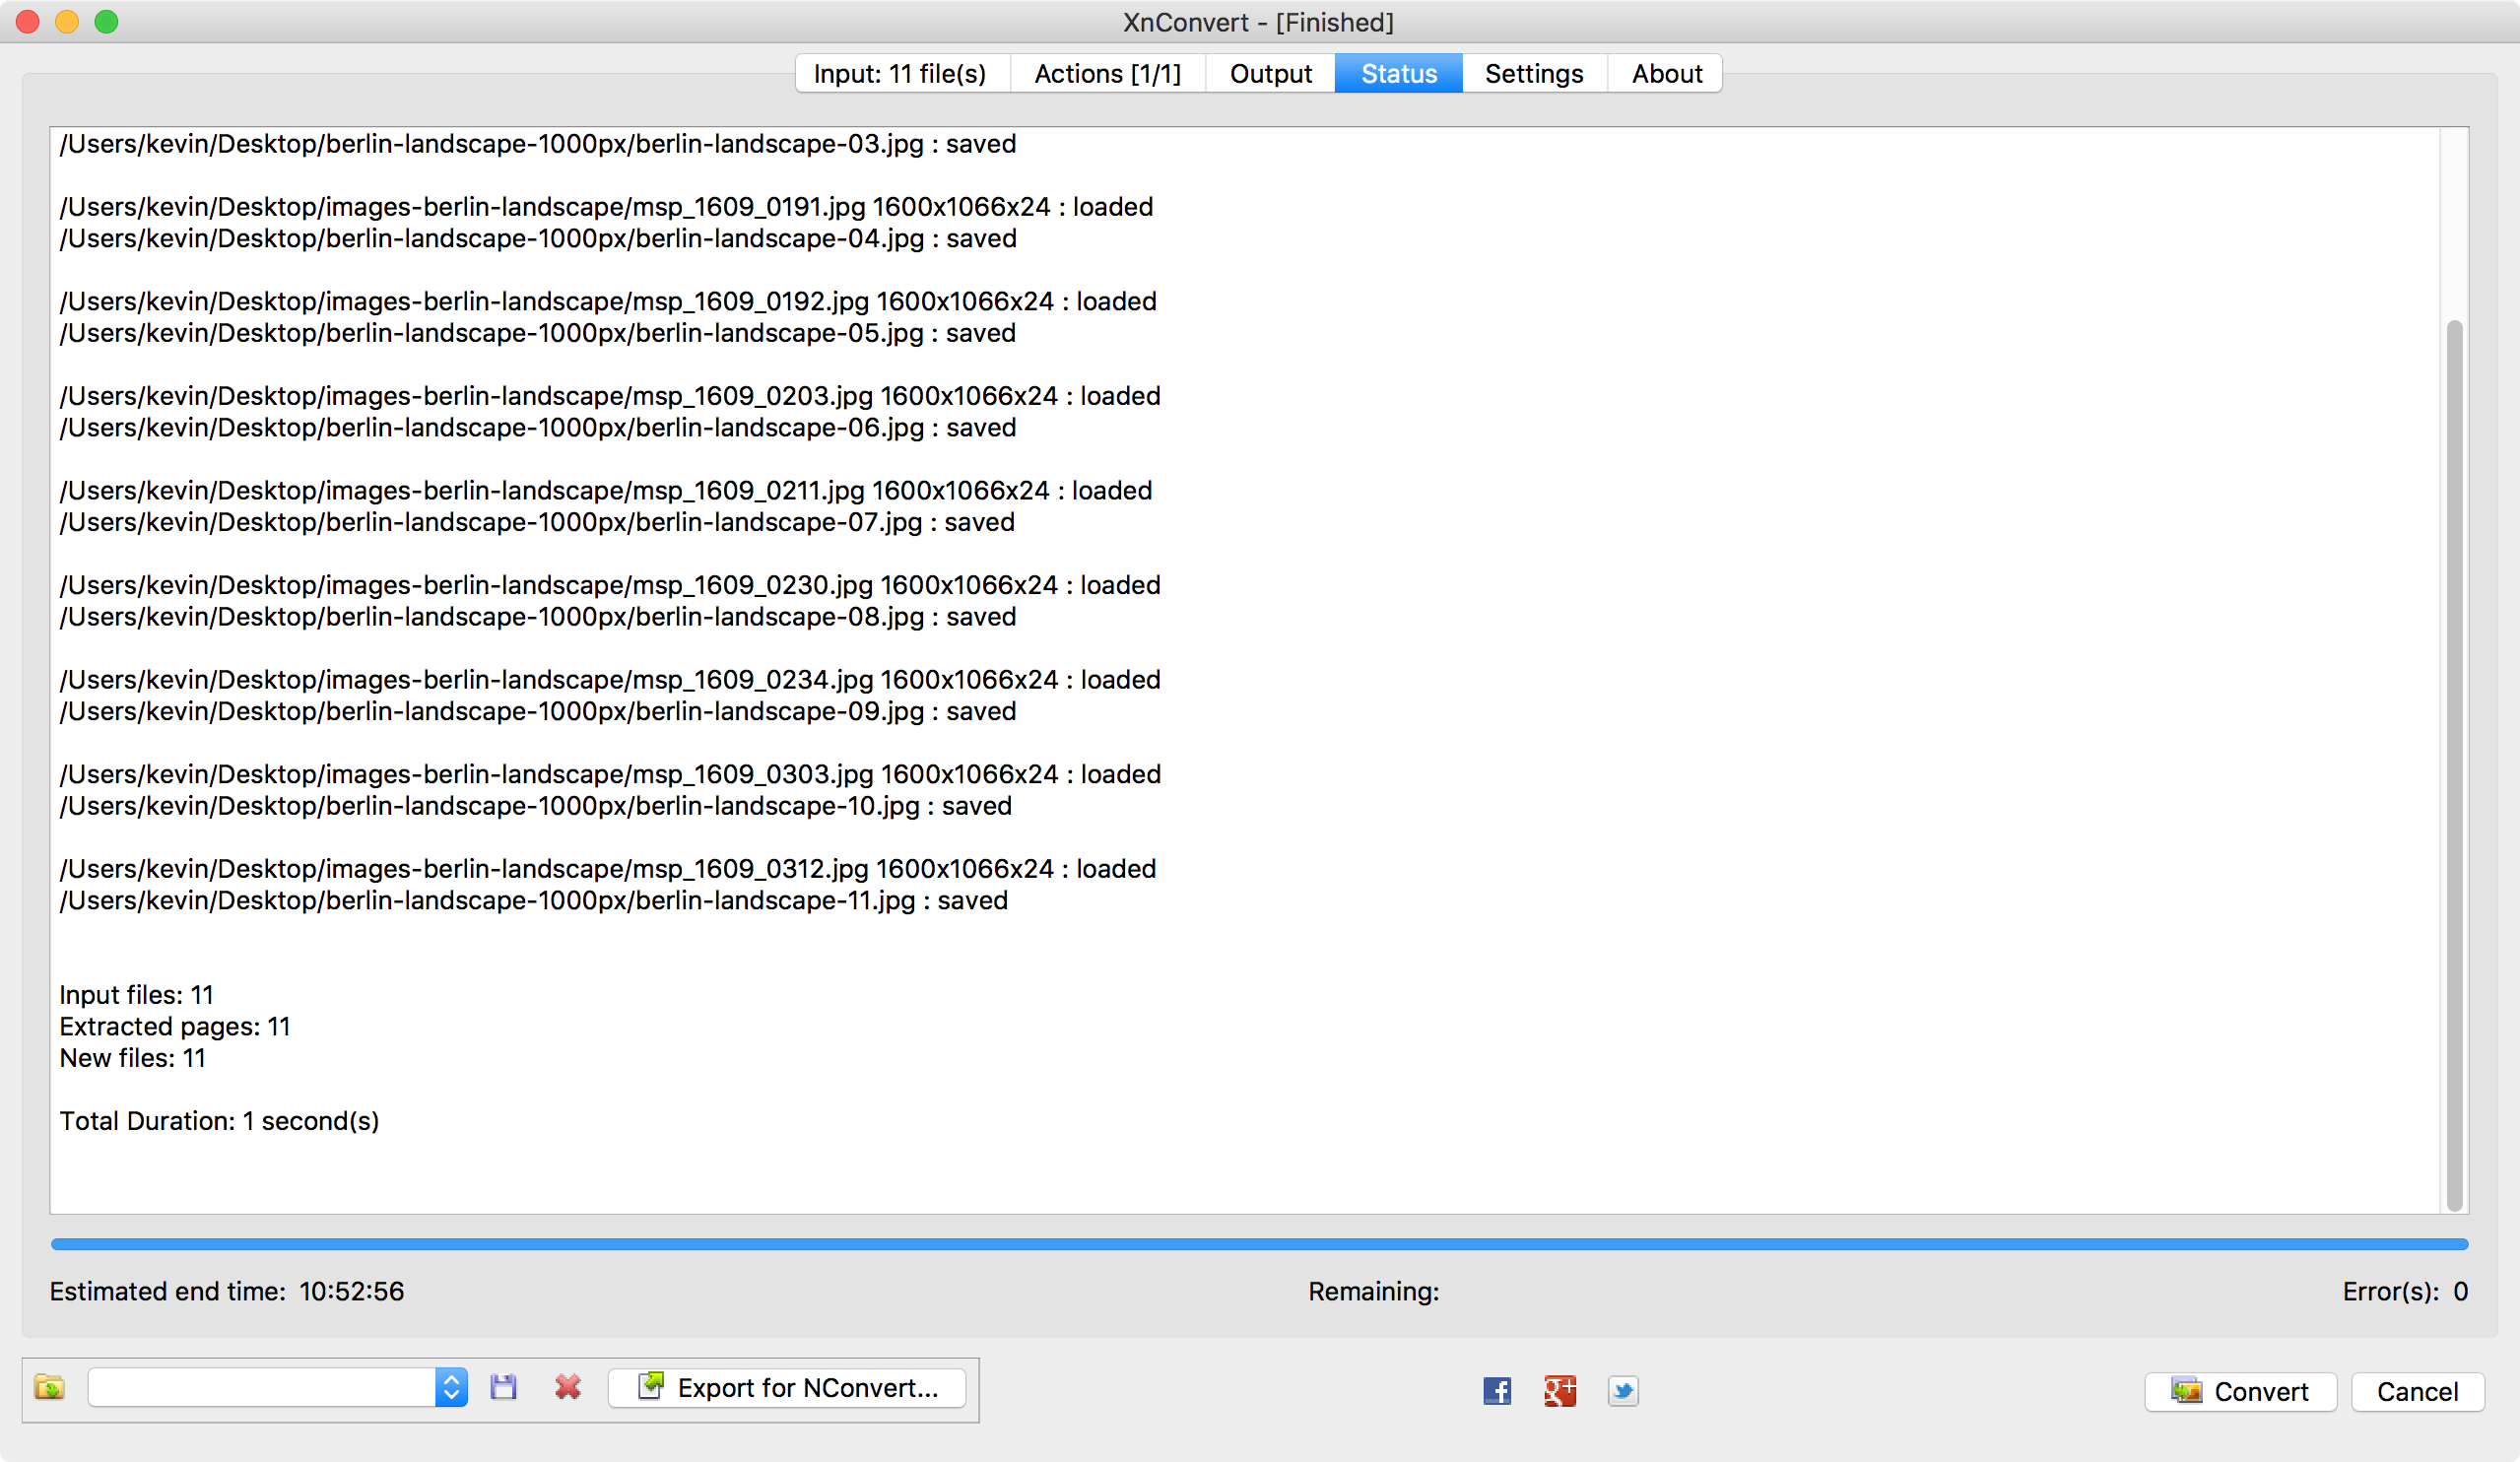
When you click Convert, the batch will run. The Status window will activate and alert you to the success of the process, or any issues with it: